From the moment they are born, children are relentless in their need to eat. It’s a bit of a shock, really, when it sinks in that you are responsible to feed your child: three meals a day, 365 days a year, with snacks in between, until they are fully grown.
If you are contemplating parenthood, it’s best not to do the math on this because it comes out to a staggering nearly 20,000 meals.
That’s just for one child.
Among those many meals, parents often find packing school lunch the most tiresome, second only to washing dishes as the most dreaded task in the kitchen. Filling a lunch box is booby-trapped with challenges: keeping spaghetti hot and yogurt cold, or preventing a sandwich from going soggy, apples from browning, and peaches from bruising. And it all feels so dire when half of those foods come home, still in their containers, virtually untouched.
Practicalities aside, the biggest complaint about school lunch is a lack of inspiration. I recently ran an informal poll of parents, and the most common refrain was that they’re in a rut, packing the same handful of foods, day in day out. They’re sick of making them; their kids are tired of eating them.
This is exactly why I wrote Best Lunch Box Ever: to give school lunch a shot in the arm and to bring ease to one of parents’ least favorite chores. It doesn’t have to be so hard.
- You can get a pot of applesauce bubbling on the stove in the time it takes to brew your morning coffee (really). Spoon that warm and homey sauce into little containers for lunches all week long.
- Set aside 30 minutes on a Saturday to bake a batch of granola bars with your kids: quality time with delicious results.
- Make use of that leftover spaghetti, repurposing it into sesame noodles studded with crunchy vegetables good enough for your child’s lunch box, and yours too.
It doesn’t require much to take the sting out of school lunches: a little planning, a little creativity, a little love. It can bring you joy. After all, you’ve got 20,000 meals to make, might as well enjoy the time in the kitchen.
If you like Coconut Granola Bark, you might like:

Coconut Granola Bark
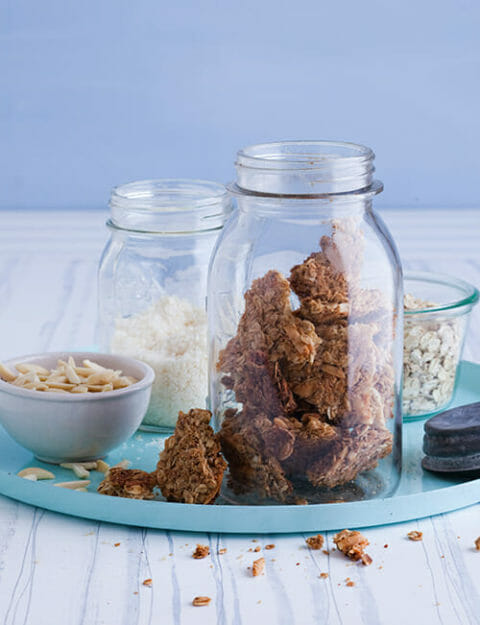
This granola bark is a twist on standard granola in which the oats are pressed firmly into a baking pan like a giant granola bar. Once it’s cooked and cooled, break it into chunks, reserving any crumbs left behind for topping yogurt or fruit salad. If you want to turn this into a more traditional granola, spread the mixture loosely over two baking sheets instead of one, and bake until nicely browned.
Ingredients
- 3 cups rolled oats not quick oats
- 1 cup slivered almonds
- 1 cup unsweetened shredded coconut
- 1/4 cup flax meal
- 1/4 teaspoon salt
- 1/4 cup pure maple syrup
- 1/2 cup firmly packed brown sugar
- 4 tablespoons water
- 1/4 cup canola oil
- 1 egg white
- 1 teaspoon vanilla extract
Instructions
-
Preheat the oven to 350°F. Line a 10-by-15-inch rimmed baking sheet with parchment paper so that it drapes a couple of inches over the two long sides.
-
In a medium bowl, mix together the oats, almonds, coconut, flax meal, and salt.
-
In a small saucepan, cook the maple syrup, brown sugar, and 1 tablespoon of the water over medium heat, stirring often, until the sugar dissolves, 1 to 2 minutes. Remove from the heat and set aside.
-
Add the remaining 3 tablespoons water, the canola oil, egg white, and vanilla to the oats mixture and stir until combined.
-
Drizzle the syrup mixture over the oats mixture and stir until combined.
-
Dump the granola onto the prepared baking sheet. With your hands, press the granola firmly and evenly onto the baking sheet, forming one giant rectangle of granola. (If it sticks to your hands, cover the granola with a piece of parchment paper as you work.)
-
Bake, turning halfway through baking, until the granola is golden brown in the center and darker brown around the edges, about 40 minutes.
-
Let cool on the baking sheet for 30 minutes. Using your hands, break the bark into pieces big enough for a couple of bites each. Stack in a roomy cookie tin for up to 1 week. Any remaining crumbly bits can be stored separately and used to top yogurt or cereal.
Photo by Jennifer Martiné
